
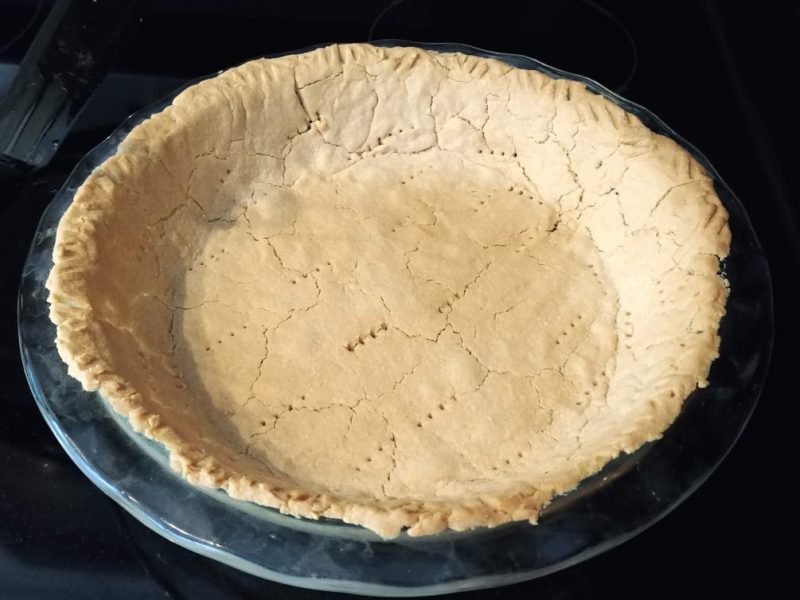
I am completely in love with Otto’s Cassava Flour! It is definitely grain free magic for Celiac friendly baking. In my opinion, it behaves the most like wheat flour, and has pretty neutral flavour – though in some recipes there’s a flavour that comes through that reminds me of the basic ice cream cones we would get as kids (think McDonalds or Dairy Queen soft serve cones), but I didn’t find it noticeable in this recipe. I tried a different pie crust recipe this time, adapting it a bit to make sense for my purposes, and I’m super impressed with the results!
I used the (ethical) palm shortening recipe from Eat Your Beets, but I baked mine uncovered at 400℉ for 20-25 minutes to get the results I wanted. I only needed 2 tbsp of ice water in my dough, but to be fair, it was a rainy day at sea level. Also, to fluff up the flour, I shook up the bag (still sealed) quite well, measured out my ¾ cups of flour, and sifted them into the bowl. This batch left me a wee bit shy on crust, but I have a rather large pie plate, and I possibly could have rolled it out a wee bit better. It definitely only makes one shell though.
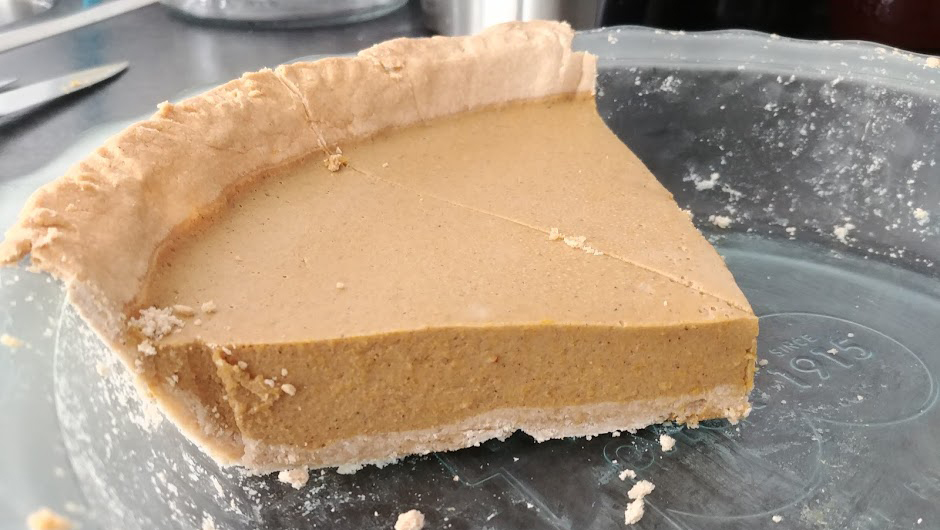
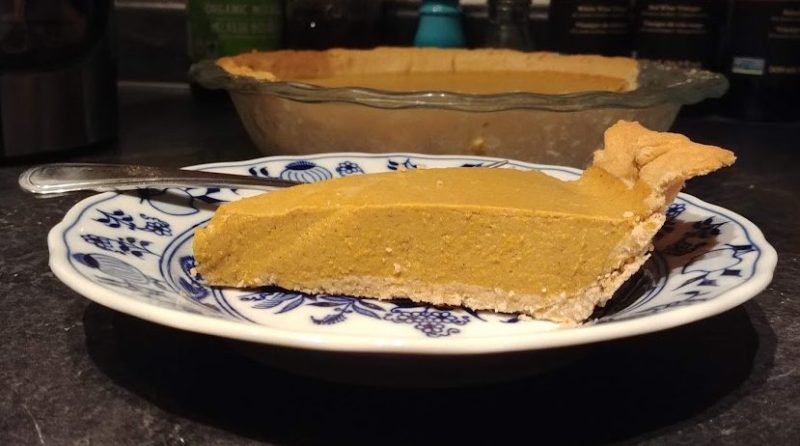
It wasn’t until I was away at university that I realized that the pumpkin chiffon pie that my mom’s family makes is actually something special! Since realizing that I have Celiac disease, and also don’t tolerate dairy or eggs, I’ve been experimenting and trying to find the best way to replicate this nostalgic dessert, and I think I have finally cracked it! So without further ado, I give you, Pumpkin Chiffon Pie.
Ingredients
For one pie, or roughly 8 portions
- One gluten free pie shell, cooked and cooled (see above recipe in discussion).
- 2 cups cooked pumpkin (frozen or canned is great; butternut squash works equally well)
- 1 15oz can of full fat coconut milk (I like organic Arroy-D)
- 1 tbsp gelatin
- ½ cup muscadovo or brown sugar
- ½ tsp salt
- ¾ tsp cinnamon
- ¾ tsp allspice
- ½ tsp ginger
- ½ tsp nutmeg
*Note that if you are following strict AIP (autoimmune paleo), use cinnamon, ginger, mace, and omit allspice. Honey or maple sugar can also be used in place of brown sugar, but start with a lower amount and adjust to taste as they tend to saturate with sweetness sooner.
Method
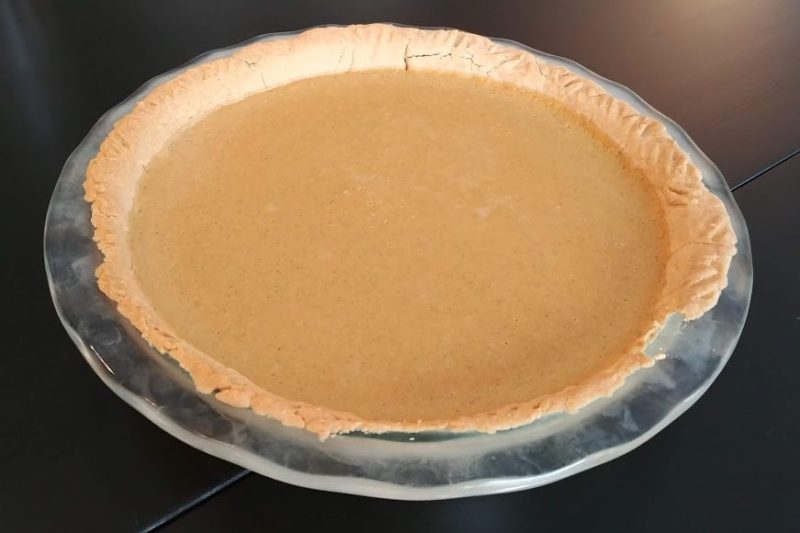
1. Prepare and bake the pie shell. Set aside to cool
2. In a medium saucepan, over medium heat, combine all of the pie filling ingredients. Stir to mix well (a whisk may be helpful here), and simmer until bubbles start to form.

3. Remove from heat, and set aside to cool (but not chill fully). I poured mine into a mixing bowl, and set it in the fridge until it was cold, but not yet solidifying. If you miss it and it gets too stiff, spoon and serve it as pumpkin parfait (layered with whipped coconut cream and crumbled crust pieces) instead.
4. Use an electric hand mixer to fluff up the pumpkin mixture. (in the original recipe, beaten egg whites would be folded in here… extra whipped coconut milk could also be folded in instead, but it will dilute the pumpkin flavour).
5. When it feels closer to the consistency of whipped cream, pour the mixture into the pie shell, smooth the surface with a spatula, and chill for a few hours.
6. Serve chilled.
7. If you wish, you can garnish it with an extra dollop of whipped coconut cream. For whipped cream, chill an extra can or two of full fat coconut milk. Spoon out the thick parts and set aside the watery coconut water to use in a smoothie later. Add a drizzle of maple syrup, vanilla bean powder, and/or lemon zest if you want to flavour it. Whip with your electric hand mixer until it forms fluffy peaks like dairy based whipping cream. Chill until ready to use.
8. Enjoy!